Today we’ll wrap up with the top new products and resources for those of you looking for new training programs to follow and/or the best new strength and conditioning information.
Top Resources of 2013 These are the top products/resources and associated content/interviews from 2013 in no particular order!
The Bulletproof Athlete Project from Mike Robertson
Please enter your first name and email below to sign up for my FREE Athletic Development and Hockey Training Newsletter!
Get Ultimate Hockey Training Now!
“…an extremely rare comprehensive look at the present state of ice hockey training.”
“…a must-have for coaches and strength professionals at all levels of hockey.”
Best of 2013: KevinNeeld.com Exercise Videos
Tuesday kicked off the “Best of 2013” series with the top hockey training, strength and conditioning, and rehabilitation articles of 2013. If you missed that post, you can check it out here: Best of 2013: KevinNeeld.com Articles
Today we’ll follow up with the top exercise videos or video-based articles from 2013. If there were other videos you enjoyed from the past year, please feel free to them in the comments section below!
Top Videos of 2013 These are the Top 5 exercise videos or video-based articles from the past year.
Notable Videos from Previous Years
The first video here was an extremely popular video displaying a series of basic mobility exercises and dynamic movements strung together to form a fairly comprehensive recovery circuit. This is a great option for in-season training sessions the day after a tough/long weekend, and if nothing else, will give you some ideas on new exercises to mix into your programs.
The second video is an old presentation Mike Boyle gave at a USA Hockey American Development Model conference. This is a MUST-WATCH video for all hockey players, parents, coaches, and supporting staff. Even though this video is a few years old at this point, it’s as relevant now as ever.
Please enter your first name and email below to sign up for my FREE Athletic Development and Hockey Training Newsletter!
Get Ultimate Hockey Training Now!
“…an extremely rare comprehensive look at the present state of ice hockey training.”
“…a must-have for coaches and strength professionals at all levels of hockey.”
Best of 2013: KevinNeeld.com Articles
With the new year upon us, I thought it would be a great time to highlight some of the top content from this past year. These are the articles, videos, and resources that have garnered the most views and interest in 2013. Enjoy and please feel free to post any additional articles you really enjoyed in the comments section below!
Top Articles of 2013 These are the Top 10 most popular posts from 2013.
Notable Post from Previous Years This article, despite being two years old, continues to be the most popular one on my site. More articles on how specific pain/discomfort in individual lifts can be troubleshooted by modifying technique are on the docket for 2014.
Please enter your first name and email below to sign up for my FREE Athletic Development and Hockey Training Newsletter!
Get Ultimate Hockey Training Now!
“…an extremely rare comprehensive look at the present state of ice hockey training.”
“…a must-have for coaches and strength professionals at all levels of hockey.”
5 In-Season Hockey Training Mistakes
I’ve written quite a bit about in-season training over the years. In particular, these two posts were extremely popular and spawned a lot of great conversations through email:
While in-season training is an essential part of a comprehensive hockey player development program, it can often times have negative effects on the player if designed improperly. With that in mind, here are 5 common in-season training mistakes:
1) Not Doing Anything
There are still players and coaches at all levels that don’t think in-season training is necessary because of the stimuli the players get on the ice. It’s important to remember that the true purpose of in-season training is to SUPPORT on-ice development, not replace it. Years ago I read (I forget where) that the overtraining feelings that many players get toward the end of the season may be the result of diminished physical capacities because of a lack of in-season training. As an oversimplified example, if a player’s max skating speed is 20 mph at the beginning of the season, and a given situation requires that they skate 15 mph, they’re skating at 75% of their maximum speed. If, throughout the course of the season, that player’s speed drops 3 mph because of lost strength to 17 mph, that same 15 mph effort is now 88% of their maximum speed. This effort at a greater percentage of maximum capacity has a more fatiguing effect on the body, which will make it less likely the player can repeat that effort throughout the entire game and will likely require longer recovery times between individual efforts, and following practices or games. This is a theoretical example with a fairly profound decrease in speed (15%), but much smaller decreases in more physical capacities will have a cumulative negative effect on a player’s performance.
2) Performing “Hockey-Specific” Training
In designing a training program to support the needs of a specific sport, there is a continuum of training methods that range from general to specific. Often times general methods are used in the early off-season, or in other words, furthest away from the time of competition. Naturally, the most specific form of hockey training is playing hockey. From an off-ice perspective, more hockey-specific training methods may include using a slideboard with specific work:rest ratios that directly train the energy systems used on the ice, or performing rotational med ball throws that improve low load high velocity power, which is influential in transferring force between the lower and upper limbs during skating, and for shooting, among other things. That said, performing too many movements using the same musculature in the same pattern is a recipe for overuse injuries. With this in mind, it’s important to consider the physical demands placed on the players ON the ice and avoid some of these patterns off the ice. Many training methods that are very appropriate and desirable throughout the off-season are not at all appropriate for in-season programs. We do almost zero loaded or plyometric-type lateral movement in-season and exactly zero rotational power work at this time because these are the qualities that the players are training at the highest volumes on the ice. As I’ve said in the past, in-season hockey-specific training is probably better described as anti-hockey specific training.
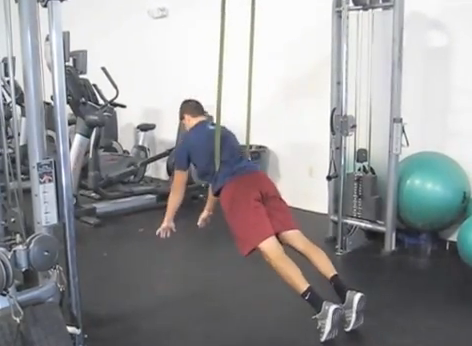
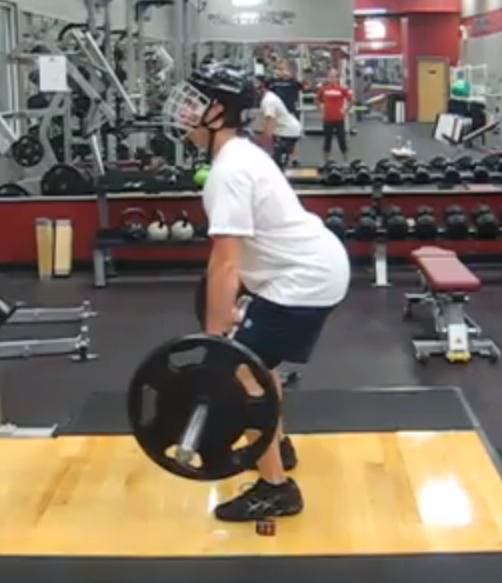
I love this exercise, but it’s probably not appropriate for in-season programs.
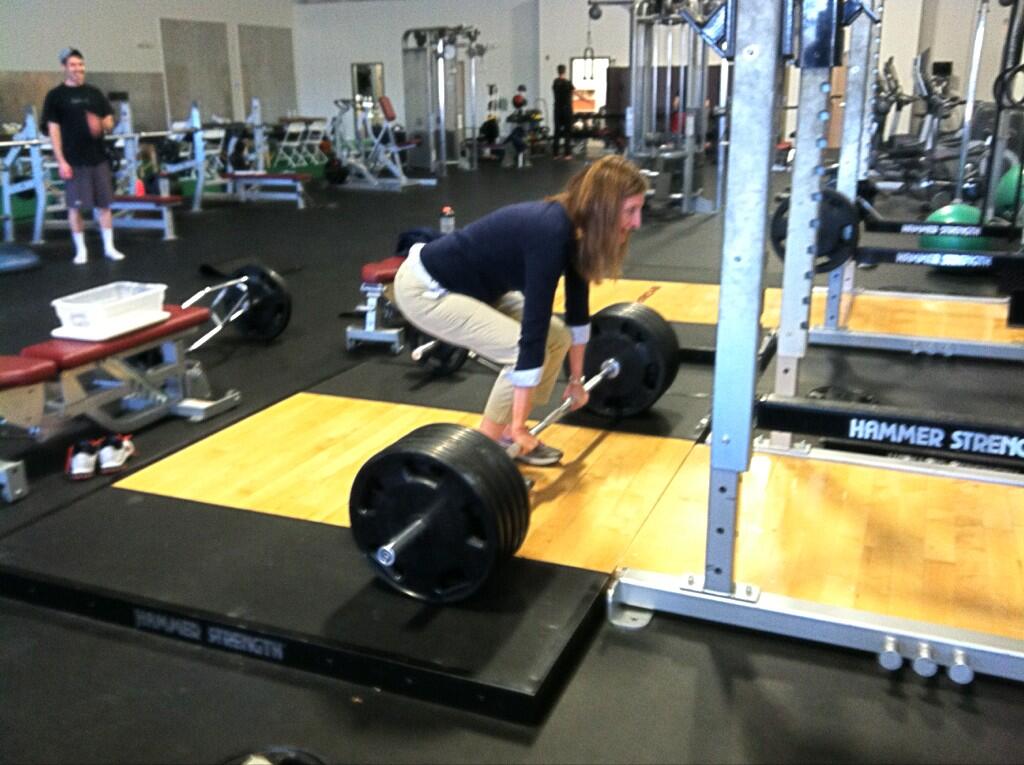
Doesn’t get much more hockey-specific than this
3) Confusing Hockey Conditioning Related to the above discussion, most in-season programs shouldn’t require a high volume of conditioning, as the most hockey-specific conditioning stimuli will come from practices and games. Regardless, there’s a bigger message here. Many players and coaches oversimplify hockey conditioning needs by, quite logically, following the thought process of:
An average shift is ~45s. If we have 3 lines or d-pairs that we’re rotating, then our conditioning should involve working for 45s, then resting for 90s.
Admittedly, this was a mistake I made early in my career. The problem with this thinking is that it’s governed by when the player steps off and back on the bench, but completely ignores what they’re actually doing on the ice. I’m reminded of a quote from Charlie Francis, a world-famous track coach who worked in the Toronto, Canada area, where he said, simply, “Watch the player, not the game.” The reality is that many shifts involve stoppages, which immediately change the work:rest ratios of the shift. Maybe more importantly, most players aren’t skating at maximum effort/speed throughout the entire shift. There are periods of maximum acceleration bursts, mid-range acceleration bursts, lots of transitions, almost no high speed transitions, gliding with a knee bend, gliding more upright, standing still, etc., all of which occur regularly and will change the energy system demands of the shift. Most hockey players would do better to spend the majority of their conditioning time training to repeat very explosive efforts by focusing on short duration, maximum effort intervals (e.g. <12 seconds) and by using various aerobic training methods to help support recovery from these higher intensity efforts AND to minimize the fatigue from more mid-range intensity efforts, opposed to performing intervals in the 30-60s ranges with work to rest ratios of 1:3-1:4, even though that’s what traditional hockey conditioning programs would suggest.
4) Doing Too Much
It takes a lot less training stimuli to maintain a physical capacity than it does to develop it, and athletes with a very young training age (read: almost ALL youth athletes) will adapt positively to a very low volume of work. Both of these realities lead to a similar conclusion: Most phases of in-season programs should be low volume, and more stimulative than fatiguing. In other words, if a player can maintain or improve his/her strength by doing 2 sets of 5 reps, they shouldn’t do 3 sets. More relevantly, they shouldn’t do 20 sets, which is more common in high school training programs. Many youth coaches and parents alike fall back on the “work them hard” idea and miss the primary value of in-season off-ice training, which is to support on-ice skill development. If a team is gassed from off-ice before stepping on the ice to practice, the quality of their on-ice repetitions will not be very high. Low quality reps in practice trains the brain/body to perform low quality reps in a game. There is more to training than just making people tired. My friend Devan McConnell, who has had a very successful two years since taking over as the strength coach at UMass Lowell, said something a while back that stuck with me. To paraphrase, “We do a little less today, so we can go again tomorrow.” There are definitely times to increase the intensity/volume of a training program, even in-season, but the general idea, especially in-season, is to not overload off-ice training volume so much that it interferes with on-ice development.
5) Ignoring Game Schedules
Youth hockey schedules are completely ridiculous. I’m not sure why 12-year olds need to play in “super showcases” throughout the country. The myth of “better competition” is fairly comical, but with the amount of money rinks and programs make with organizing these events, they’re unlikely to go away in the near future. To take a step back, we have in-season programs written out for the entire season for the Team Comcast organization we train. Doing this allows us to map out or progressions, alter the exact training stimuli throughout the year, and ultimately ensure the kids are making the progress we want them to. That said, we also write recovery workouts and our staff knows when to dial things back, even if it wasn’t part of the initial plan. This is especially important the week leading up to and the week following 3+ game tournaments or even just 2 games against a great opponent. Remember that there is a significant amount of stress associated with “big game” competition, and this will increase the recovery demands following the event. This may be especially true if the team loses these games, which is sometimes when coaches use off- or on-ice work to “punish” the team. I don’t want to discount using difficult practices to send a message, but it is important to keep the consequences in mind. You can’t ignore recovery, and continuing to pile on stress is going to, at a minimum, increase the recovery time/resources needed by the players, and could potentially lead to one or more players getting hurt or sick.
That’s a wrap for today. Don’t forget that you can grab a copy of Ultimate Hockey Training and I’ll pay for your shipping until the New Year if you live in the US or Canada! (January 1st, 2014).
Please enter your first name and email below to sign up for my FREE Athletic Development and Hockey Training Newsletter!
Get Ultimate Hockey Training Now!
“…an extremely rare comprehensive look at the present state of ice hockey training.”
“…a must-have for coaches and strength professionals at all levels of hockey.”
Boxing Day Special
I hope you and your families are enjoying a relaxing holiday week. This is one of my favorite times of year, as the holidays not only give me an opportunity to spend some more time with friends and family, but I also enjoy the cooler temperatures, getting to check in with some of our college and junior players that stop by while they’re home for break, and it’s both the middle of the hockey season and the start of NFL playoffs. There’s a lot to appreciate about Winter!
On that note, I wanted to take a moment to thank you for being a loyal supporter of my work. Whether you’ve been around since I first started writing in 2008 or accidentally stumbled upon a blog post in the last week, I truly appreciate you being a part of this site and my life. Over the last 5 years, I’ve had countless awesome conversations about training (and life) and have developed several great friendships with readers. It’s always fun for me to meet someone at a seminar that I’ve emailed back and forth with, or bump into a hockey parent or coach at a rink that has been a newsletter subscriber for years. I started writing back in ’08 because I love the game of hockey and wanted to help share information that I thought would benefit other people who, like I did as a player, wanted to work hard to improve their game, but may not have access to great information. I had no idea then, and continue to be amazed now, that it would lead to so many relationships and opportunities down the road.
In the interest of maintaining the holiday spirit and in acknowledgement of the celebration of Boxing Day for my neighbors up North, I’m offering FREE shipping on my book Ultimate Hockey Training to the U.S. and Canada until the new year.
Yes, that’s the holiday spirit.
I often get questions about speed training for hockey or in-season training. The great thing about Ultimate Hockey Training is that it describes my entire training SYSTEM. In other words, it’s not just a random collection of exercises or vague training guidelines. It provides an incredibly comprehensive look at exercise progressions, year-round training guidelines, and a scientific rationale for each component of the training system. And if you sign up as an “Insider”, you get access to the exact training programs we use with our players each month AND to an exercise database with over 800 exercise videos! Not a bad deal for less than the cost of a few skate sharpenings. You buy the book, and I’ll cover your shipping!
Please enter your first name and email below to sign up for my FREE Athletic Development and Hockey Training Newsletter!
Get Ultimate Hockey Training Now!
“…an extremely rare comprehensive look at the present state of ice hockey training.”
“…a must-have for coaches and strength professionals at all levels of hockey.”


 Use CODE: "Neeld15" to save 15%