At this point I thought it would be a good idea to recap all the things we’ve discussed over the last week.  Below is a summary of the process I take when an athlete comes to me reporting groin pain.

1. Question about the nature of the pain

  • When did the pain/discomfort start? Was there a specific incidence that caused it?
  • Where is your pain located?
  • What does the pain feel like? Dull aching, sharp, radiating, etc. 
  • What types of exercises/movements cause pain?  Is the pain immediate or does it come afterwards? 
  • Describe the intensity of the pain.  On a scale from 0-10, 10 being unbearable excruciating pain, where would you rate your pain when it first comes, a couple hours later, the next day, etc?
  • How long does the pain last?

2. Posture Analysis

  • Hip Position: Anterior/Posterior Pelvic Tilt, Lateral Pelvic Tilt, Rotation
  • Knee Position: Knee caps pointing in? Relatively in line with femur and tibia?
  • Foot Position: In-/Out-Toed? Flat footed? Check shoes-Note uneven wear on inner (excessive pronation-usually excessive hip internal rotation )or outer borders (excessive supination)

3. Range of Motion Analysis

  • Thomas Test: Extensibility of hip flexors. Note compensatory rotations with lengthening
  • Hip Internal/External Rotation ROM: Test with hips flexed to 90 degrees and with hips extended
  • Quadruped Rocking: Note maximum hip flexion before lumbar rounding

4. Muscle Function Test

  • Seated Psoas Test: Note ROM, strength, and compensatory motion on each side
  • Side Lying Hip Abduction: Note ROM, strength, and compensatory motion on each side
  • Front Plank: Endurance test for time
  • Side Plank: Endurance test for time on each side

5. Movement Analysis

  • Double-Leg Movements: Squat, Deadlift, and Stiff-Legged Deadlift Patterns
  • Single-Leg Movements: 1-Leg Squat, 1-Leg Deadlift, 1-Leg Stiff-Legged Deadlift, and Reverse Lunge Patterns
  • In all movements, note movements of the knee, hip, and lumbar spine, keeping the whole body movement in mind.

By completing the above screen/analysis, I have a better idea of any predisposing factors or resulting functional impairments related to the athletes groin or hip pain.  This will allow me to communicate more effectively with an athletic trainer, physical therapist, or sports physician (if the athlete is lucky enough to have access to any of these professionals).  At a minimum, it will give me an idea of areas the athlete’s abilities and areas that need improvement or areas to avoid.

Next up: How to get back on track following a groin injury…

Please enter your first name and email below to sign up for my FREE Athletic Development and Hockey Training Newsletter!

The final step in our groin pain analysis is to look at a few movement patterns and see if you can pick up on any “abnormal” movement.  

Nothing too complicated here.  Basically we just want to have them perform a couple double-leg and single-leg movements and note the positions of the femurs, hip, and lumbar spine.  

Double-Leg Movements

  1. Squat Pattern (Hands behind head)
  2. Deadlift Pattern (Hands at side)
  3. Stiff-Legged Deadlift Pattern (Hands on front of legs)

Single-Leg Movements

  1. 1-Leg Squat
  2. 1-Leg Deadlift
  3. 1-Leg Stiff-Legged Deadlift
  4. Reverse Lunge

With all the other information we’ve collected at this point, some of the movement impairments should be pretty easy to pick up on.  For instance, if your athlete didn’t have hip flexion above 90 degrees during quadruped rocking, you’ll probably notice some sort of compensatory movement (probably at the lumbar spine) during the double-leg movements when this hip angle is reached and likely some form of rotation during the single-leg movements.  

Two of the other big things to look for are the knees caving in during any of the movements, and the femur internally rotating during the single-leg movements.  In general, this is indicative of poor strength and/or motor control of hip abduction and/or external rotation and will lay the foundation for some of the future training to prevent the reoccurrence of groin/hip injuries.

An important note: Remember that if your athlete ALREADY has groin pain, it’s possible that any movement abnormalities that you observe are a RESULT of the injury/pain and NOT the cause of it.  Frequently the two will go hand in hand, but it’s important that we don’t automatically assume it’s the poor movement causing the pain, and not current pain causing circumstantial poor movement.  

Keep working hard…

Please enter your first name and email below to sign up for my FREE Athletic Development and Hockey Training Newsletter!

Coming down the home stretch of the groin/hip pain analysis…

 A couple simple tests I’ve borrowed from Shirley Sahrmann and Stuart McGill to assess hip and “core” strength: The Seated Psoas Test, Lying Hip Abduction Test, Front Plank Endurance Test, and Side Plank Endurance Test.  

The Seated Psoas Test involves testing the strength and function of the psoas major, the muscle that contributes the most force to hip flexion above 90 degrees.  Have your athlete sit down with their feet flat on the ground so that their hip is flexed to 90 degrees and their upper body is perfectly upright (tell them to “sit tall”).  Have them lift one foot off the ground and hold it there.  If they can do that, add a little pressure to the top of their knee and see if they can resist it.  Do this on both sides.  Note inabilities to perform this movement at all, compensatory movement patterns, weakness, range of motion, and side to side differences. 

The Lying Hip Abduction Test: Have your athlete lie on their side with their bottom hip flexed to 90 degrees and their top hip extended fully.  Have them place a hand on their hip and tell them not to let that move at all.  Then have them lift their top leg as high as they can (without their hip or lumbar spine moving).  If they can handle that, apply a little pressure to their foot and see how well they’re able to resist it.  Repeat on the other side.  Note inabilities to perform this movement at all, compensatory movement patterns, weakness, range of motion, and side to side differences.

The Front Plank Endurance Test is really straight forward.  Have your athlete set up in a front plank position (similar to a push-up position but on their forearms with their elbows directly under their shoulders with their hips even with their shoulders).  Have them hold this position for time.  As soon as form starts to break down, the test is over.  In general, you want them to be able to hold the position for at least 60 seconds.

The Side Plank Endurance Test is very similar.  Have your athlete set up in a side plank position (elbow under shoulder, hips stacked and raised off the ground).  Record the amount of time your athlete is able to hold this position with perfect form.  Give them a couple minutes to rest then repeat on the other side.  In general, you want them to be able to hold this position for at least 45s and there should be less than a 10% difference in side to side times. 

I think it’s extremely important to make sure your athletes have proper gluteus maximus (read: butt) function, but I don’t test for it.  Frankly, I’m not sure there’s an athlete in the world that can’t benefit from glute bridges/glute bridge holds, quadruped hip extensions, bird dogs, etc.  Because I know I’m going to program that stuff in anyway, I don’t test it.  I will ask athletes if they feel like they have trouble contracting one or both sides while they do some of the dynamic assessments though, just to get a crude idea of any side-to-side differences. 

That concludes the static assessments.  All that’s left is a few dynamic movements to assess movement abnormalities/deficiencies and putting all this together to see if/how we can address the pain and get athletes back to a healthy status.  Stay tuned…

Please enter your first name and email below to sign up for my FREE Athletic Development and Hockey Training Newsletter!

5 weeks of relatively severe calorie restriction and intense training…

On Thursday I was down almost 20 pounds from when I started.  Lucky for me, it was time for my second schedule refeed day, which I celebrated with, among other things, a Trader Joe’s Pizza for breakfast and a hefty dinner at P.F. Chang’s with my girlfriend Emily.  The two of us took down what looked like a 2 pound piece of chocolate cake, a la mode of course, in about 3 minutes.  I guess you could say we’re growing kids.  Replenishing all my carb stores and with the accompanying water, I put on 10 pounds that day!  I’ve been riding the extra energy wave ever since.  It feels great!  

I’m ending this twisted experiment after this week.  That’ll be 6 weeks since I started.  At the end of this week, I’ll stick with a similar diet, tons of high quality protein and fat and essentially NO carbohydrates from sources other than fruits and vegetables, but I’ll be upping my caloric intake considerably.  I’m also starting to add in some regular conditioning, which should help maintain the fat loss I’ve experienced in the last few weeks despite eating more.  I have to go get ready for a hockey game.  This week’s training program below for those of you that are interested.  Enjoy your weekend.     

Feb 2, 2009
A1) Back Squat: 3s Negative: 135 x 5; 225 x 3: 315 x 2: 335 x 2: 345 x 4 sets of 2
A2) Bird Dog Hold: 3 x 15s each
B1) Stiff-Legged Deadlift: 225 x 4; 315 x 4; 325 x 4; 335 x 4; 345 x 4
B2) Front Plank March: 4 x 20s
C1) 1-Leg Squat:3s Negative: 3 x 5 each
C2) Glute Ham Raise: 3 x 10

Feb 3, 2009: 165 lbs weigh-in
A1) Standing Shoulder Press: 45 x 4; 95 x 4; 135 x 4; 135 x 4; 125 x 4; 125 x 4
A2) Scap Wall Slides (Back to Wall): 3 x 8
B1) Weighted Chin-Up: BW x 5; BW+35 x 3 sets of 6; BW+35 x 5.5
B2) DB Triceps Extension Ecc-to-Close Grip Con: 2 x 45 DB 4 x 8
C1) 1/2 Kneeling Chop: 1 set to Left; 3 sets to Right 50 lbs  x 8 reps
C2) Face Pull w/ External Rotation: 100 lbs x 3 x 10

Feb 4, 2009: 163 lbs weigh-in
A1) Front Squat: 135 x 5; 185 x 3; 225 x 3; 245 x 3; 265 x 3
A2) Side Plank w/ Abduction Hold: 3 x 15s each
B1) DB Back Leg Raised Split Squat: 2 x 65 DB x 1 x 6each 2 x 70 DB x 2 x 6each
B2) 1-Arm DB 1-Leg SLDL: 1 x 40 DB x 3 x 6 each
B3) Bar Rollout: 3 x 10
B4) Stability Ball Hamstring Curl: 3 x 12
CON 1 x 25min Med-High Intensity Bike Ride 7.75 miles, 215 calories, HR about 170

Feb 5, 2009: 163 lbs weigh-in…173 lbs weigh-out Best Refeed Day Ever!
CON Interval Bike Ride: 8 x :20/:40

Feb 6, 2009: 170.5 lbs weigh-in
A1) Bench Press: Medium Grip 135 x 5; 225 x 3; 245 x 1; 215 x 8; 215 x 7.5+Help; 205 x 6+2Help
A2) I, Y, T Holds: 1 x 30s each
B1) 1-Arm DB Row: 1 x 90 DB x 3 x 6 each
B2) Standing Cable Chop: To Right Only 50 lbs x 3 x 8
B3) 1-Arm DB Push Press: 1 x 50 DB x 2 x 6 each; 1 x 55 DB x 1 x 6 each
B4) DB Hang Clean-to-Curl Eccentric: 2 x 40 DB x 3 x 6
B5) Bird Dog: 3 x 8 each
CON 10 x 10 Medicine Ball Overhead Floor Slams 30s rest between sets

Feb 7, 2009: 169.5 lbs weigh-in
CON KB Swings: 16kg x 20; 20kg x 20; 20kg x 4 x 15 16kg x 4 x 15 30s rest between sets


-Kevin Neeld

Please enter your first name and email below to sign up for my FREE Athletic Development and Hockey Training Newsletter!

Sahrmann’s Quadruped Rocking Exercise, that I’ve mentioned a couple times in the last few weeks, can reveal a lot of valuable information about hip flexion range of motion.  My interpretation of a conversation I had with Sahrmann is that 8-10 reps of quadruped rocking should loosen up any soft tissue restrictions.  If it doesn’t, the range that they’ve consistently shown is likely all their anatomy will allow for.

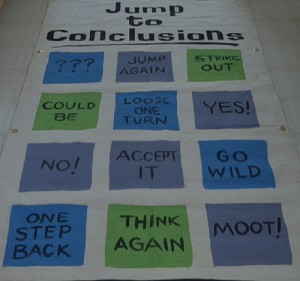
While I’ve used this test and found it to be very helpful, it’s probably not as straight forward as “if that’s all they’ve got, that’s all they’ll ever have.”  There’s one particular incidence that you should consider before you jump to conclusions.

Jump to Conclusions

Tightness of the posterior hip capsule (ligaments connecting the posterior femur to the sacrum and hip) can lead to similar range of motion restrictions as hip impingement.  I was talking to Eric Cressey the other day, and he said that, in general, bone will move in the direction opposite of capsular tightness.

Applying that to our hip, that means tightness of the posterior hip capsule will likely result in a forward movement of the femoral head within the acetabulum (“hip socket”).  When attempting to enter into hip flexion, this disadvantageous femoral head position, combined with a tightness of the posterior ligaments, can result in both a restricted range of motion with accompanying hip tuck, AND discomfort in the “groin” area.

Luckily, posterior hip capsule tightness IS a modifiable factor and one that should be explored.  At the hands of a good manual therapist (I’d recommend an Active Release Techniques practitioner), long-standing posterior capsule tightness can be resolved in a few weeks (sometimes a few visits, and if the therapist is REALLY good, sometimes significant progress can be made in a few minutes).

Remember.  Nothing in the human body is as simple as “if you have this, this is why.”  Just some food for thought.

Speaking of food…Yesterday was my second ReFeed Day, since starting my calorie restricted diet.  I weighed in yesterday morning at 163.  After finishing a cottage cheese, ground flax seed, chocolate protein powder, peanut butter, and deluxe mixed nuts concoction in the shower last night, I weighed out at 173.  Yes, it was a great day.  And yes, I eat in the shower.  What do you mean that’s weird? If Kramer can make a salad in the shower, I can eat dessert in the shower…

Kramer Stop

Keep working hard.

Please enter your first name and email below to sign up for my FREE Athletic Development and Hockey Training Newsletter!

Use CODE: "Neeld15" to save 15%